Portrait drawing for beginners — Expert Tips.

Hello Friends !!
We have started the series of learning the artwork in a simple and smart way.
To learn the technique of make artwork you need to cross 5 floors and 15 rooms and every floor and room will give you something to remember.
And once you reached on top you will have the following with you.
How to observe the target.
How to hold a pencil eraser and other instruments.
How to draw realistic.
How to draw in perfect proportions.
How to present your artwork.
And many more.
Originally posted on “ Portrait drawing for beginners” — sketchofsun.com
1st Floor, Room1 (Basics Techniques of Drawing and Sketching)
This will give you an idea of very basics techniques of Drawing and sketching.

Mind Status of an artist :
Calm mind & Stress-free body
Like any other activity, sketching and drawing is also the game of mind. One should be calm and stress-free before he or she sits for drawing. There is no stress of making wonderful art. Everything you draw will be an art if you are doing it with your heart. Connect your feeling with your artwork, no matter if it is good or bad for others. Always Feel proud of your work and keep an empty space for improvement, because every artist, small or big, has a scope of improvement. So don’t be overconfident and don’t be underconfident. Just take a control of your mind.
Stationary required to practice.
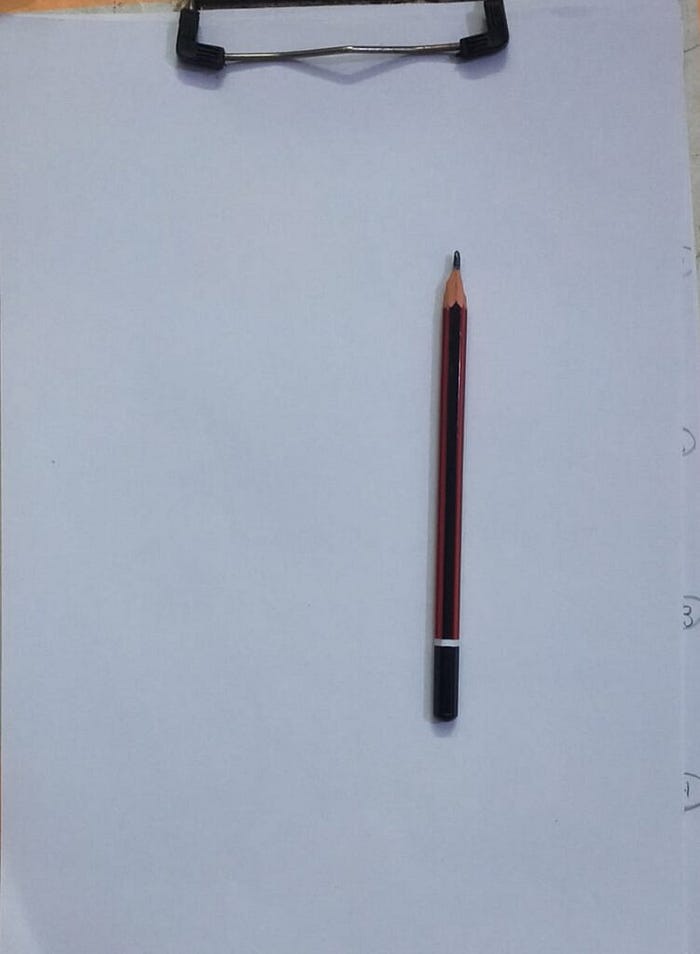
1) Any Rough sheet, rough register, the backside of any notebook, or even newspaper will work because this is not what you are presenting to others. This is a practice to know what you are good at and what you are not. This is more related to a hand movement practice rather than the output from that movement.
2) One sharp pencil. We all have pencils at home so, at this point there is no need for various kinds of pencils, we need only one sharp pencil, which every you have no matter the size or type or a company.
How to hold the pencil?
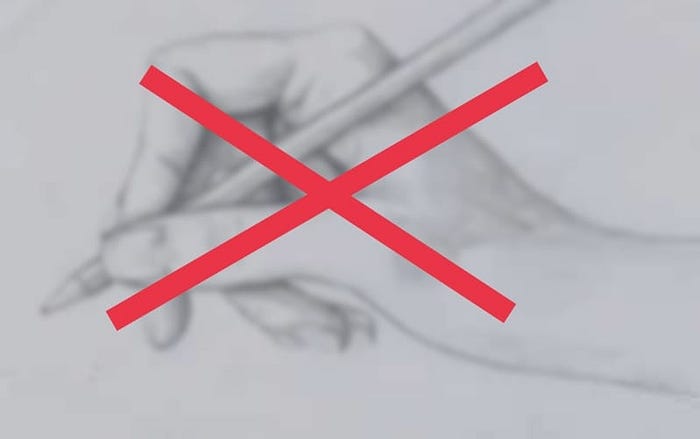
Tripod Grip:
Avoid this hold now for drawing or sketching because this type of holding has lots of limitations, we will use this later on but I know you are perfect in holding pencil by this type, but for drawing and sketching avoid hold tripod grip.
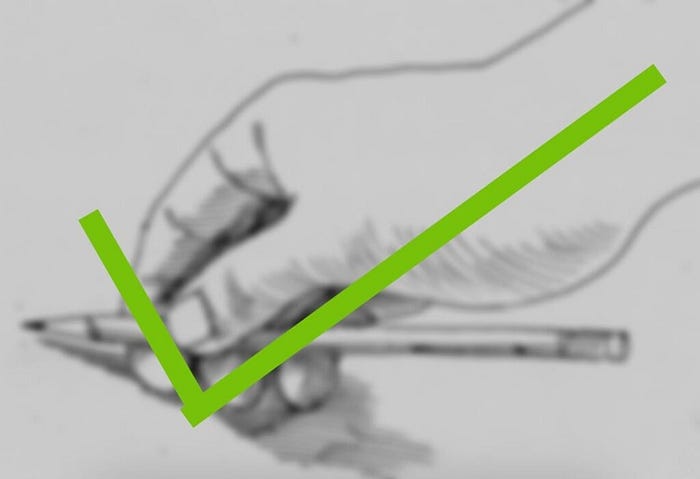
Overhand grip:
This is the best way to hold the pencil for drawing and sketching it will give you to draw lines and circles freely. In the beginning, you will find it difficult but after practice, you will be able to move the hand with an overhand grip and this is a must to draw the portraits.
Sitting position
Sit in a comfortable position, on a table and chair or on the floor with a small table or anywhere but make sure your back should be straight, your hand should be freely movable on the sheet with the correct direction and your piece of paper is stable not moving or wobbling. Use clips to hold the paper.
What to draw?
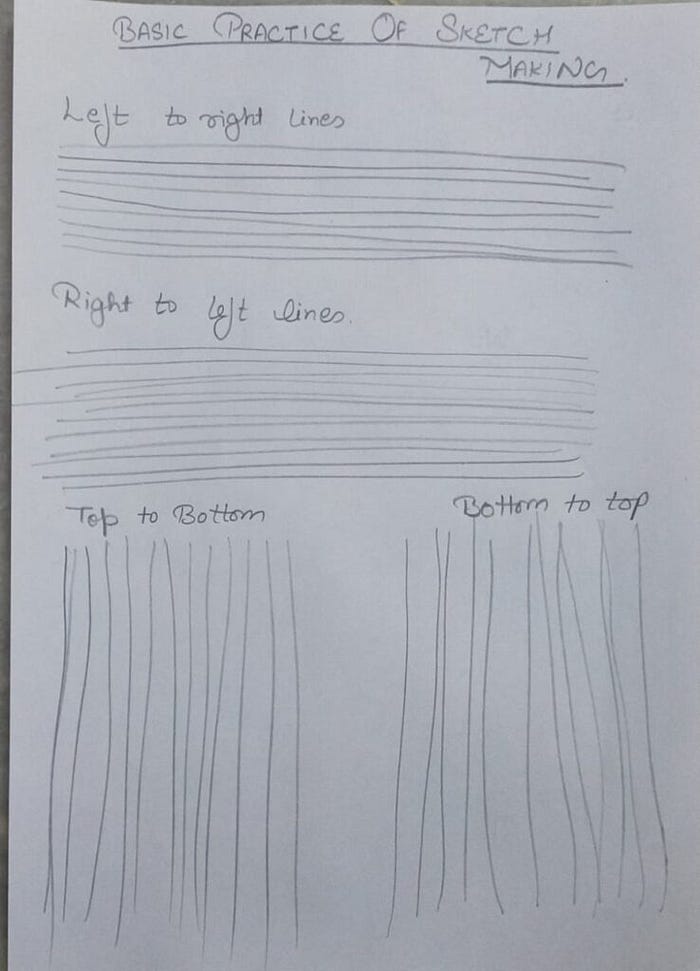
Straight Line
Left to right: Hold the pencil through the overhand method and draw the line from left to right.
Right to left: Hold the pencil through the overhand method and draw the line from Right to left.
Top to Bottom: Hold the pencil through the overhand method and draw the line from Top to Bottom.
Bottom to top: Hold the pencil through the overhand method and draw the line from bottom to top.
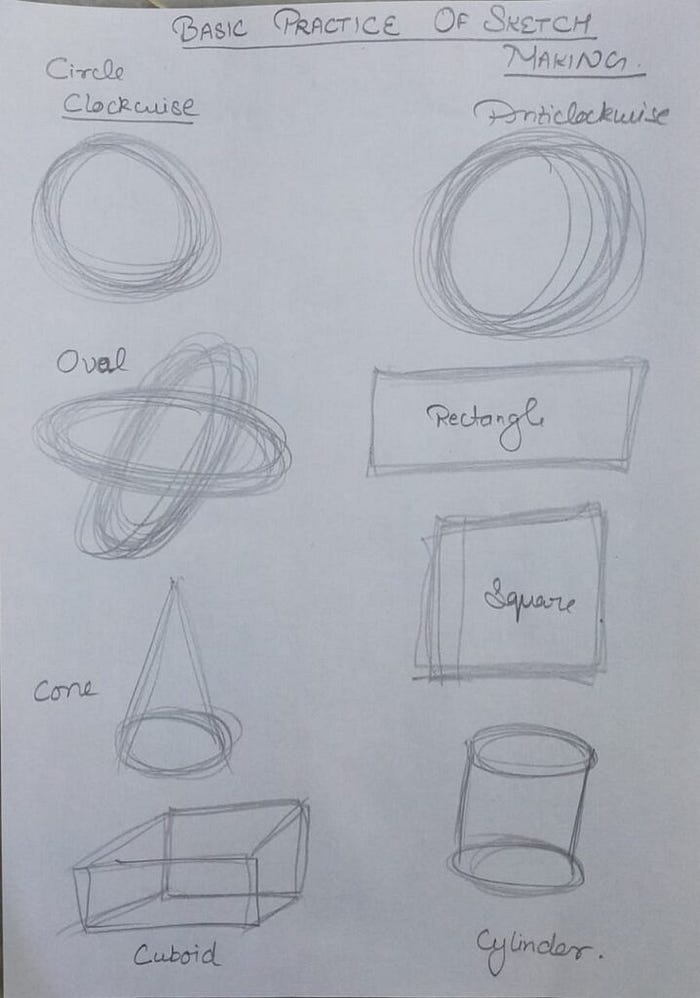
Circle: Draw circle clockwise and anti-clockwise using the overhand method, one has to practice this again and again as this is mandatory to have a free hand in making the circle.
Oval: Draw over anticlockwise and clockwise with the overhand method. Let your hand go through the shoulder and elbow movement practice to draw such figures because it will help you in the future.
Practice for other shapes as shown
Practice the basic shapes and make your hand muscles memorize the movement.
